Tuesday, July 27, 2010

Bridal Shower


This is a few weeks old now, but i thought I'd share the awesome cake i made for my friend's bridal shower. She loves the topsy turvy look but her fiance said it doesn't look like a wedding cake - so i decided that she will get her topsy turvy cake (and to much surprise an Alice In Wonderland Theme Bridal Shower). Her colors are cornflower and latte - and no bridal shower is complete without a little pink in there. The words are the chorus lyrics to the song that she and her fiance are going to dance to their first dance with. They've picked "Pieces" by Red. Made of Butter Golden Cake and Buttercream filling and MMF. My husband and I totaled up the amount of hours i spent on this cake and came up between 17 and 18 hours!!! Holy cow Batman!!! I'm just glad that everyone seemed to enjoy the cake.


Yummy Chocolate Ganache

I recently found a quick and easy recipe for chocolate ganache - yum!!

1 cup heavy whipping cream
1 bag of semi-sweet chocolate chips

boil cream. pour over chocolate chips and stir together, will look runny until all mixed.

Thursday, June 17, 2010

My First Topsy Turvy Cake

Hello. I know I don't update on here nearly enough, but I wanted to share that with the help of my sister last Friday (because I was finishing up with a nasty cold - but was no longer contagious, don't worry) I made my first topsy turvy cake!!! I started on Wednesday with baking and making the fondant and buttercream frostings that I was going to need. I made 5 batches of MMF (Yum!), 1 batch of regular buttercream and 5 batches of banana cream buttercream (yes, banana!!!) Any ways, the cake tasted awesome and got many compliments on it.


I wanted to share the links that I used to help me in creating my cake. You must give credit where credit is due. And besides, it would have been a huge mess and would have just ended up wishing I could do something that cool. :)

Janell's Cakes made this awesome quick video on YouTube - that is very helpful to watch.

There is also a site that has pictures and kinda does a pretty decent job at explaining each step (which is helpful incase you don't get what is going on in the video b/c there's no narration.)


Anyways, I just wanted to share and say look out cake world, here I slowly come! :) One day, I will be able to create master pieces with cake and other edible items (my favorite is rice krispies - easy to mold and make). My next step is to defiantly learn how to make flowers. I mean - you can't make a wedding cake usually without knowing how to make edible flowers. I can't wait to make wedding cakes for my friends and family so that I can actually one day make them for people I don't know and be proud to say I made their wedding cake and added to their most beautiful day and the start of their new lives. But, until then, I am going to work on my small cakes and flowers.

Friday, May 21, 2010

MMF


Hello everyone. I tried making Marshmallow Fondant and have never made fondant before, but may i say it was so easy and tastes WAY better than the store bought stuff. I found though, you have to grease everything. The first batch i made was too sticky but after it sat over night in plastic wrap it was fine, the second batch was totally fine to use right away. :)


Batch #2
Batch #1

----------------------------------------------------------

MMF Recipe

INGREDIENTS

1 (454 gm) bag of mini marshmallows
2 tbsp. water
5-6 cups of icing sugar
1 tsp. of lemon,orange or almond extract (optional)


1. Put water and marshmallows in a GREASED microwaveable bowl. Microwave for 1 minute on high, let sit for 1 minute and then remicrowave for another minute.

2. Carefully remove the bowl from the microwave mixing the marshmallow "goop" with a GREASED spoon or spatula. I then poured it into my Kitchen Aide Mixing Bowl (The bowl's metal or i would have just used that bowl). Add 6 cups of confectioners sugar (i found that it needs 6 cups to not be sticky) - Add 1 cup at a time. Use the dough attatchment (Greased) to mix the marshmallow "goop" with the sugar.

3. In order for the dough to become smooth, you must then grease your hands and knead the dough with your hands. When smooth, place in plastic wrap. (It is helpful to lay out the plastic wrap prior to kneading the fondant with your hands.

Let it sit and you're good to go :) Enjoy!


Wednesday, May 5, 2010

1st Post

This is my first post on here. We'll see if I can figure this out. :) Here are a few of my cakes to date. I just started doing cakes not too long ago and am learning so much by reading stuff online. I have a few more cakes that I will be doing and will post as I go along. :) Hope you enjoy.


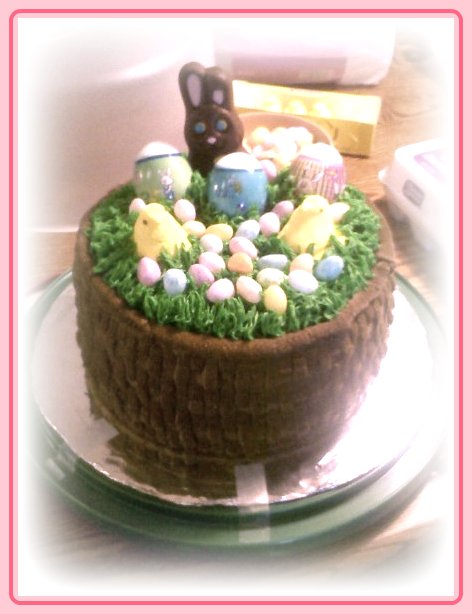
This was for this past easter - yay chocolate bunnies :)